Uploading Files
Learn how to upload and process media files in OpenTranscribe.
Supported Formats
Audio
- MP3, WAV, FLAC, M4A, OGG, WMA
- Any format FFmpeg can decode
Video
- MP4, MOV, AVI, MKV, WebM
- Maximum size: 4GB
Upload & Processing Workflow
Upload Methods
Drag & Drop
- Drag files to upload area
- Multiple files supported
- Optionally organize into collections and tags (see below)
- Auto-queue processing
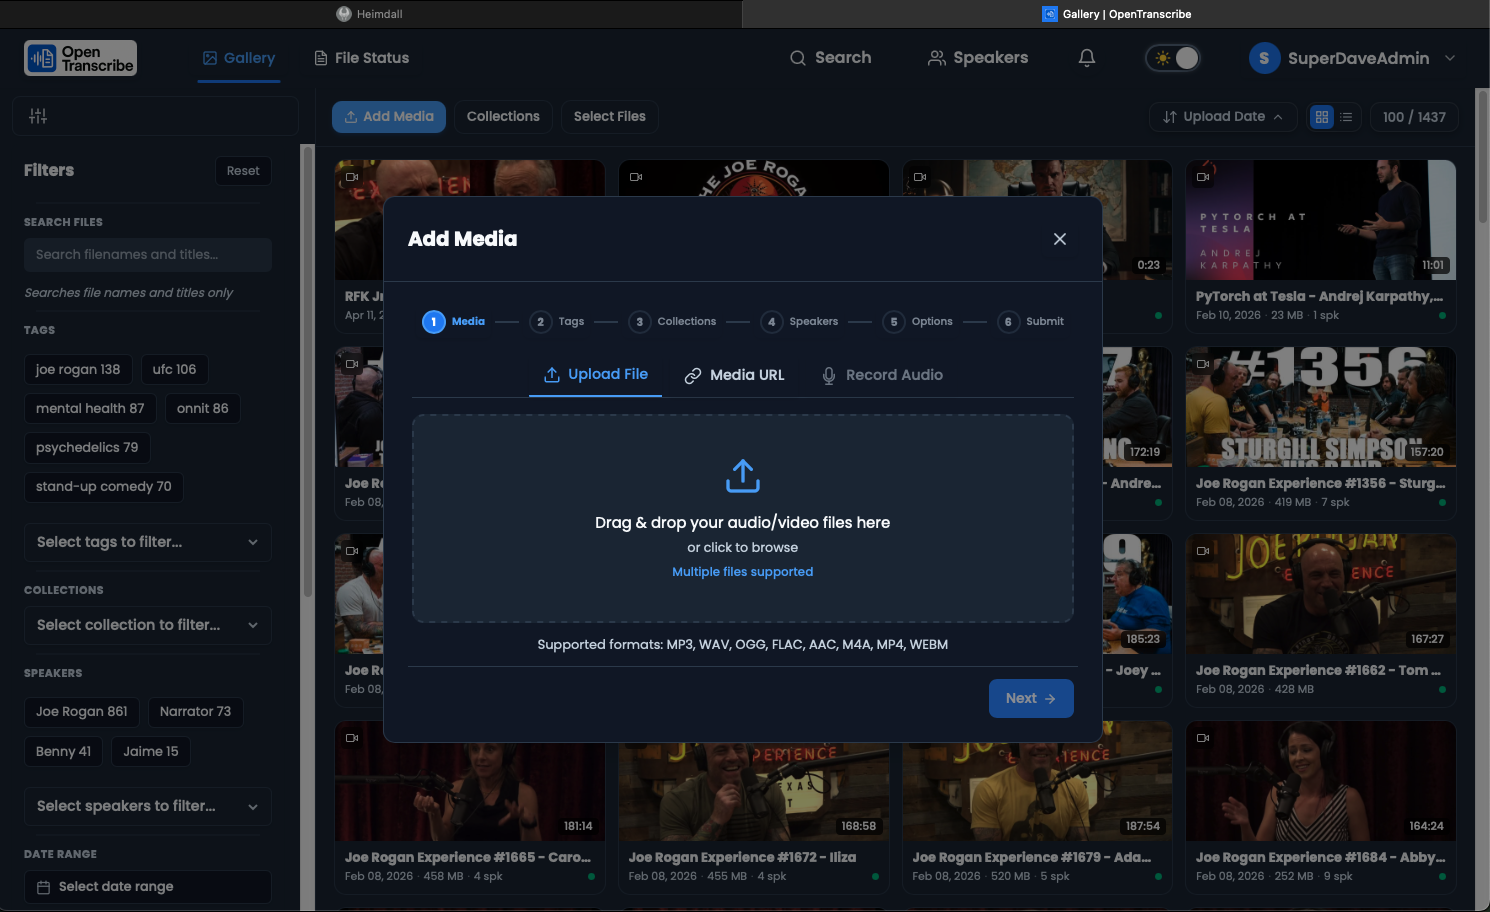
File Browser
- Click "Upload" button
- Select file(s)
- Optionally organize into collections and tags (see below)
- Confirm upload
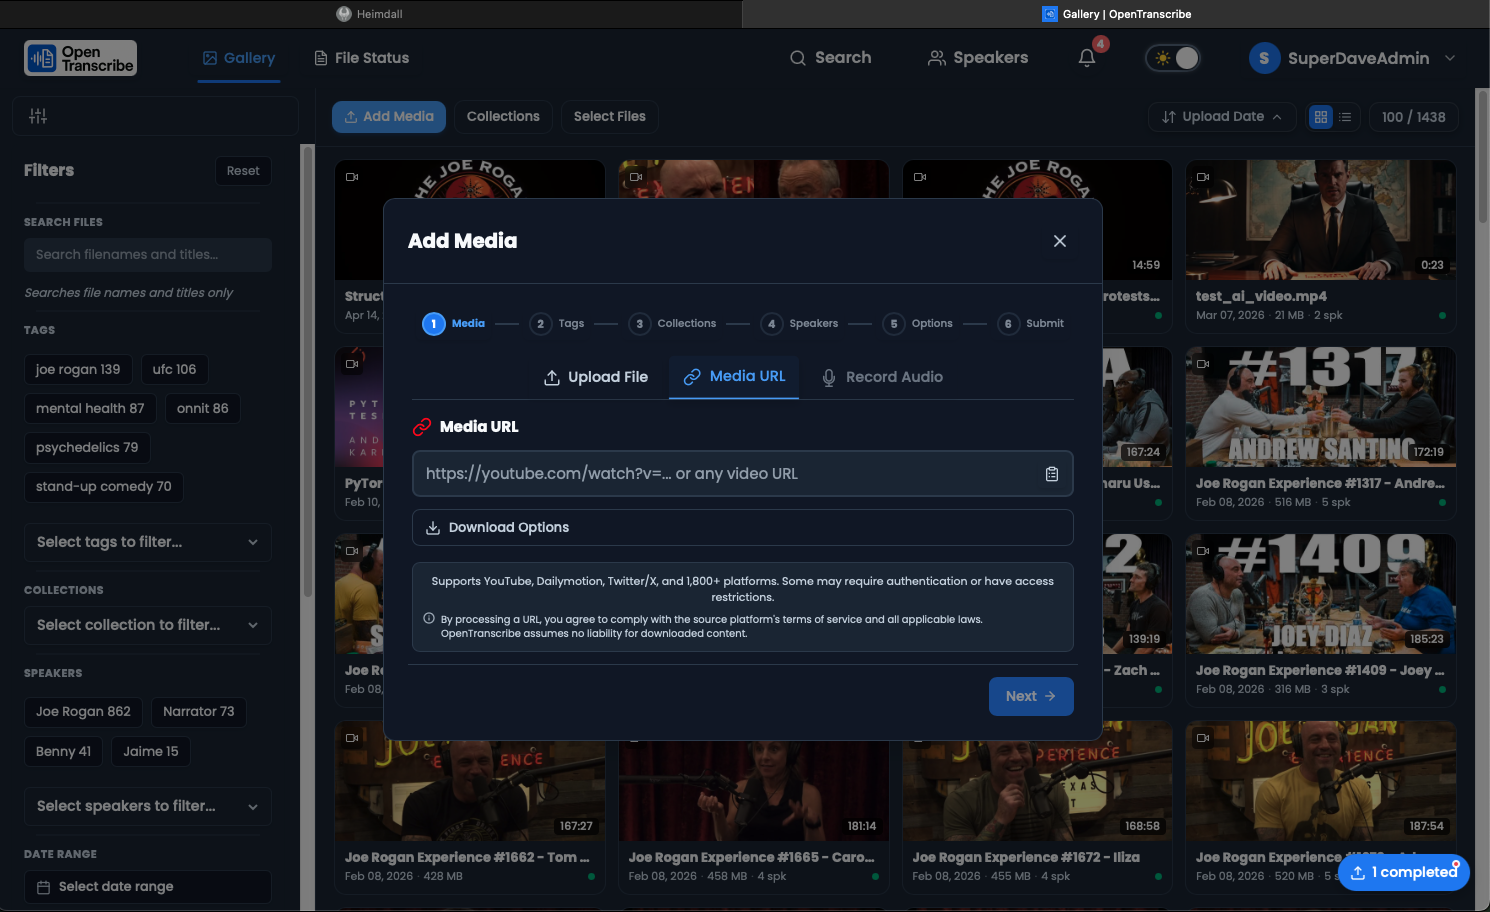
Media URL (1800+ Platforms)
- Paste video URL from supported platforms
- Supported: YouTube, Dailymotion, Twitter/X, TikTok, Vimeo, and 1800+ more
- Auto-downloads in web-compatible format and processes
Best supported platforms:
- YouTube (including playlists)
- Dailymotion
- Twitter/X
Limited support (may require authentication):
- Vimeo, Instagram, Facebook, TikTok
If a video fails to download, OpenTranscribe provides helpful error messages with platform-specific suggestions. Common issues include:
- Authentication required - Video requires login (try YouTube or Dailymotion instead)
- Age/geo-restricted - Content blocked in your region
- Premium content - Requires subscription on source platform
URL Download Quality Settings
You can configure download quality preferences in Settings > Downloads:
- Video Quality: Choose resolution (e.g., 1080p, 720p, 480p, or best available)
- Audio Only: Download only the audio track (faster, saves storage)
- Audio Quality: Select audio bitrate when downloading audio only
You can also override these defaults per-download by expanding the quality options panel in the URL upload dialog.
Organizing During Upload
When uploading files, you can assign them to collections and tags directly in the upload dialog:
- Expand the Organize section in the upload dialog
- Select one or more existing collections or create new ones
- Add existing tags or type new tag names
- Upload the file -- it will be automatically organized
This saves time compared to organizing files after upload. Tags and collections can also be managed later from the file detail page.
If auto-labeling is enabled (Settings > Auto-Label), OpenTranscribe can automatically suggest tags and collections based on AI topic analysis after transcription completes. See AI Summarization for details.
Selective Reprocessing
Already-transcribed files can be reprocessed with a stage picker that lets you run only specific stages:
- Open a file's detail page
- Click Reprocess (or select multiple files in the gallery and use bulk reprocess)
- Choose which stages to re-run:
- Transcription -- Full re-transcription with current Whisper model
- Re-diarize -- Re-run speaker diarization only (keeps existing transcript)
- Search Indexing -- Rebuild the search index entry
- Analytics -- Recalculate speaker analytics
- Speaker LLM -- Re-run AI speaker identification
- Summarization -- Regenerate AI summary
- Topic Extraction -- Re-run AI topic analysis
- Optionally adjust speaker settings (min/max speakers)
- Confirm and process
This is useful when you want to update just the summary with a new prompt without re-transcribing, or re-diarize with different speaker count settings.
Export Options
OpenTranscribe supports multiple export formats accessible from the Export dropdown on any completed transcript page. You can also bulk-export across multiple files.
TXT -- Plain Text
A configurable plain-text export. When you choose TXT, a dialog lets you toggle what to include:
- Timestamps -- Segment start/end times in
[MM:SS - MM:SS]format - Speaker names -- Speaker labels before each segment
- Comments -- User-added comments inline
Your preferences are remembered for future exports. Consecutive segments from the same speaker are automatically merged for readability. Overlapping speech is formatted as a special block:
[02:15 - 02:20] OVERLAPPING SPEECH:
  Alice (02:15 - 02:18): That's a great idea but--
  Bob (02:16 - 02:20): I completely disagree!
JSON -- Structured Data
Exports the full transcript as a JSON file containing:
- Every segment with
start_time,end_time,text, andspeaker_id - Speaker metadata and display names
- Word-level timestamps (when available)
Useful for programmatic analysis, importing into other tools, or building custom reports.
CSV -- Spreadsheet Format
Exports segments as comma-separated values with columns for timestamp, speaker, and text. Open directly in Excel, Google Sheets, or any spreadsheet application for sorting, filtering, and analysis.
SRT -- SubRip Subtitles
Industry-standard subtitle format compatible with virtually all video players (VLC, MPC, Plex, etc.). Features:
- Movie-style formatting with 42-character line wrapping
- Optimal display timing based on reading speed (200 WPM)
- Speaker labels included by default (toggle with the include speakers option)
- Overlapping speech merged into single cues with speaker attribution
- Long segments automatically split into readable subtitle blocks
VTT -- WebVTT Subtitles
Web Video Text Tracks format for HTML5 video players and web applications. Same formatting as SRT but uses the WebVTT standard (dots instead of commas in timestamps, WEBVTT header).
Bulk Export
Export subtitles for multiple files at once:
- Select files in the gallery using multi-select (checkboxes)
- Choose Export from the bulk actions menu
- Select your format (SRT, VTT, or TXT)
- Files are bundled into a single ZIP download
Up to 100 files can be exported in a single bulk operation. Files that are not yet completed are automatically skipped.
Bulk subtitle export is asynchronous: the ZIP is built on the download worker while live progress streams to the browser over SSE, then delivered via a short-lived presigned URL -- rather than a synchronous download that blocks until the archive is ready.
Video Download with Embedded Subtitles
When downloading a video file, OpenTranscribe automatically embeds subtitles using FFmpeg:
- Subtitles are added as a soft subtitle track in the downloaded MP4
- Speaker labels are included by default
- Use the Download Original option to get the file without embedded subtitles
File Management
Editing File Metadata
After upload, you can update a file's metadata from the detail page:
- Click on a file to open the detail view
- Click the title at the top to edit it inline
- Press Enter or click outside to save
Editable fields:
- Title -- Display name shown in the gallery and search results (also updates the search index)
- Filename -- Original filename
File Status Tracking
Each file has a status indicating its current state:
| Status | Description |
|---|---|
pending | File uploaded, waiting to be queued |
queued | In the processing queue |
downloading | URL-sourced file is being downloaded |
processing | Transcription/diarization in progress |
completed | Processing finished successfully |
error | Processing failed (check the error message for details) |
cancelling | Cancellation requested, waiting for worker |
cancelled | Processing was cancelled by the user |
orphaned | Processing appears stuck with no active worker |
You can view detailed status information -- including active task ID, last error message, and retry count -- via the status detail panel on the file page.
Bulk Operations
Select multiple files in the gallery using the checkbox on each card, then use the bulk actions toolbar:
| Action | Description |
|---|---|
| Delete | Delete selected files and all associated data |
| Reprocess | Re-run the full transcription pipeline |
| Selective Reprocess | Choose specific stages to re-run |
| Summarize | Generate AI summaries for all selected files |
| Cancel | Cancel active processing tasks |
| Retry | Retry failed or cancelled files |
| Export | Bulk export subtitles as a ZIP file |
All bulk operations report per-file success/failure results.
Recovering Stuck or Failed Files
If a file is stuck in processing status or has failed:
- Check the status detail -- Click the file and look at the error message and recommendations
- Retry -- For files in
error,cancelled, ororphanedstatus, click Retry to re-queue - Cancel and retry -- For stuck processing files, click Cancel first, then Retry
- Recover -- Use the Recover action to attempt automatic recovery of stuck files
- Force delete (admin only) -- Admins can force-delete files even while processing
The system automatically detects stuck files (processing longer than the threshold, default 2 hours) and provides recovery recommendations.
Administrators have access to additional file management capabilities:
- Stuck files report -- View all files stuck in processing beyond a configurable threshold
- Cleanup orphaned files -- Bulk recover or mark files that lost their worker connection
- Reset retry count -- Allow re-processing beyond the normal retry limit
Speaker Analytics
Once a file completes processing, OpenTranscribe computes detailed analytics automatically (or on-demand if missing). View analytics from the Analytics tab on the file detail page.
Talk Time
- Per-speaker talk time in seconds and as a percentage of total duration
- Total talk time across all speakers
- Silence ratio -- percentage of the file with no speech detected
Word Count and Speaking Pace
- Word count per speaker and overall total
- Speaking pace in words per minute (WPM), calculated as total words divided by total talk time
- Useful for identifying fast or slow speakers in meetings
Interruptions
- Interruption count per speaker -- detected when a new speaker begins before the previous speaker finishes
- Total interruptions across the conversation
- Helps identify dominant speakers or heated discussions
Turn-Taking
- Turn count per speaker -- number of times each speaker takes the floor
- Total turns in the conversation
- Reveals participation balance and conversation dynamics
Questions
- Question count per speaker -- detected by segments ending with
? - Total questions asked during the conversation
Refreshing Analytics
If speaker names are updated or segments are edited, you can recalculate analytics:
- Click Refresh Analytics on the file detail page
- Or select Analytics as a reprocessing stage during selective reprocess
Recording Audio
Record audio directly in your browser without any external software:
Starting a Recording
- Click the microphone icon in the top navigation bar
- Grant microphone permission when prompted by your browser
- Select your microphone from the device dropdown (if you have multiple)
- Click "Start Recording"
During Recording
- Audio level meter shows real-time volume so you can verify your microphone is working
- Duration counter displays elapsed recording time
- Pause/Resume the recording at any time without losing progress
- Recording format: WebM with Opus codec at 128 kbps
Finishing a Recording
- Click "Stop" when you are finished
- The recorded audio is automatically uploaded to OpenTranscribe
- Standard transcription processing begins immediately
For best results, use an external microphone rather than a built-in laptop mic. Ensure your environment is quiet and speak clearly. Monitor the audio level indicator to confirm your voice is being captured.
Recording requires a modern browser with MediaRecorder API support (Chrome, Firefox, Edge, Safari 14.1+). Your browser must have permission to access the microphone.
Upload Manager
Floating upload manager shows:
- Upload progress
- Queue position
- Processing status
- Error messages