Your First Transcription
This guide walks you through creating your first transcription in OpenTranscribe, from upload to analysis.
Step 1: Prepare Your Media File
OpenTranscribe supports a wide range of formats:
Audio Formats
- MP3 - Most common audio format
- WAV - Uncompressed audio (best quality)
- FLAC - Lossless compression
- M4A - Apple audio format
- OGG - Open-source audio format
Video Formats
- MP4 - Most common video format
- MOV - Apple video format
- AVI - Windows video format
- MKV - Matroska video container
- WEBM - Web-optimized video
File Size Limits
- Maximum file size: 4GB
- Recommended: Under 2GB for faster processing
- Long videos (3+ hours) supported
For best transcription quality:
- Use clear audio with minimal background noise
- Single speaker per channel if possible
- Good microphone quality (not phone speaker recordings)
- Volume normalized - not too quiet or clipping
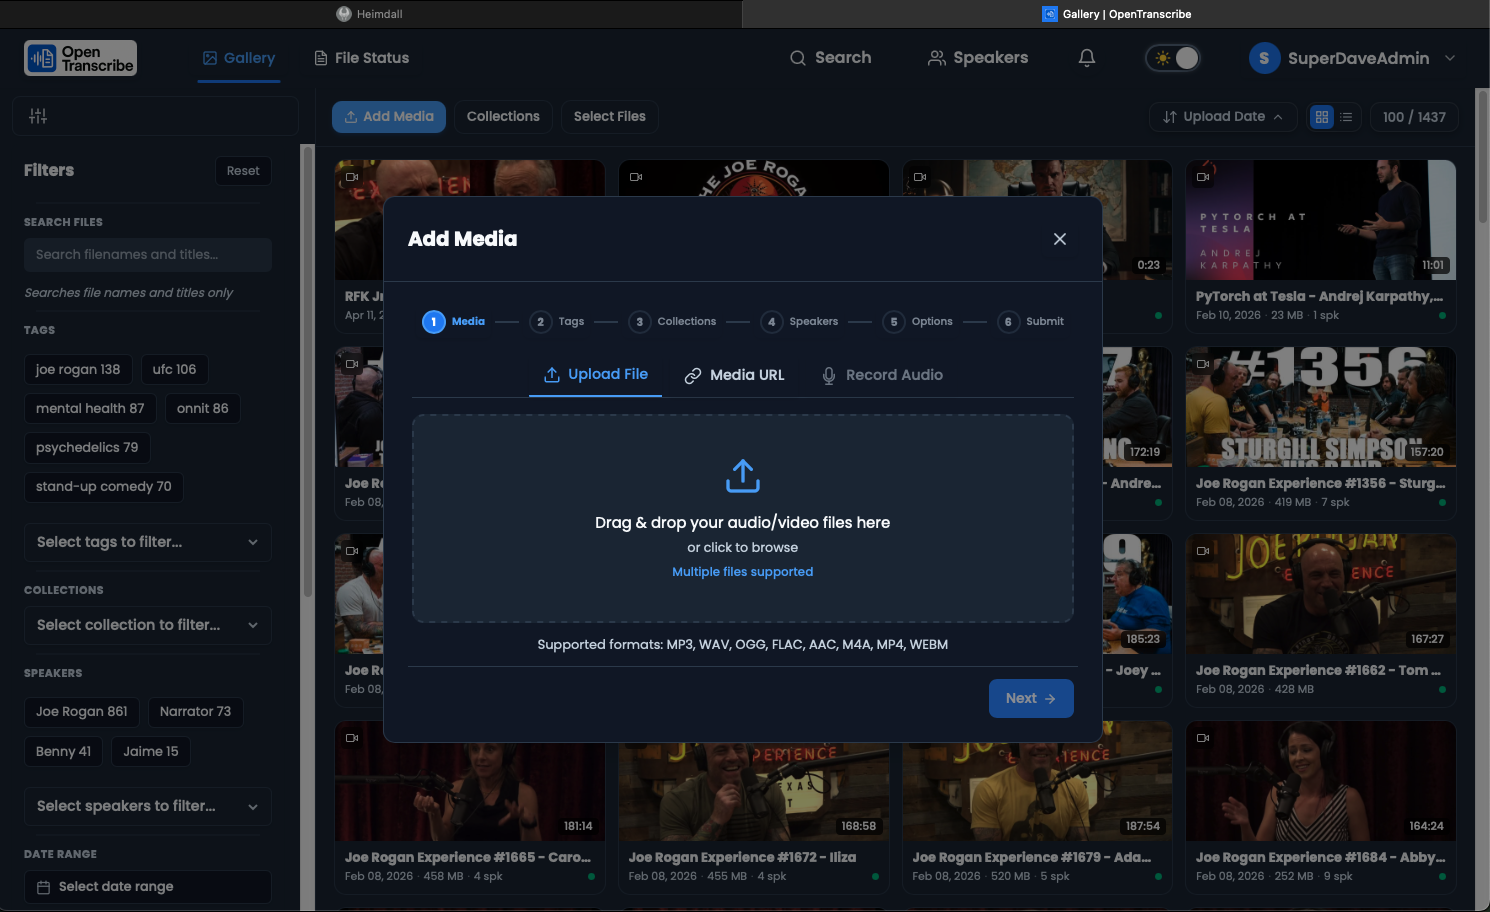
Step 2: Upload Your File
Via Web Interface
- Click "Upload Files" button in the top navigation bar
- Drag and drop your file onto the upload zone, or click to browse
- Select your file from your computer
- Watch the upload progress in the floating upload manager
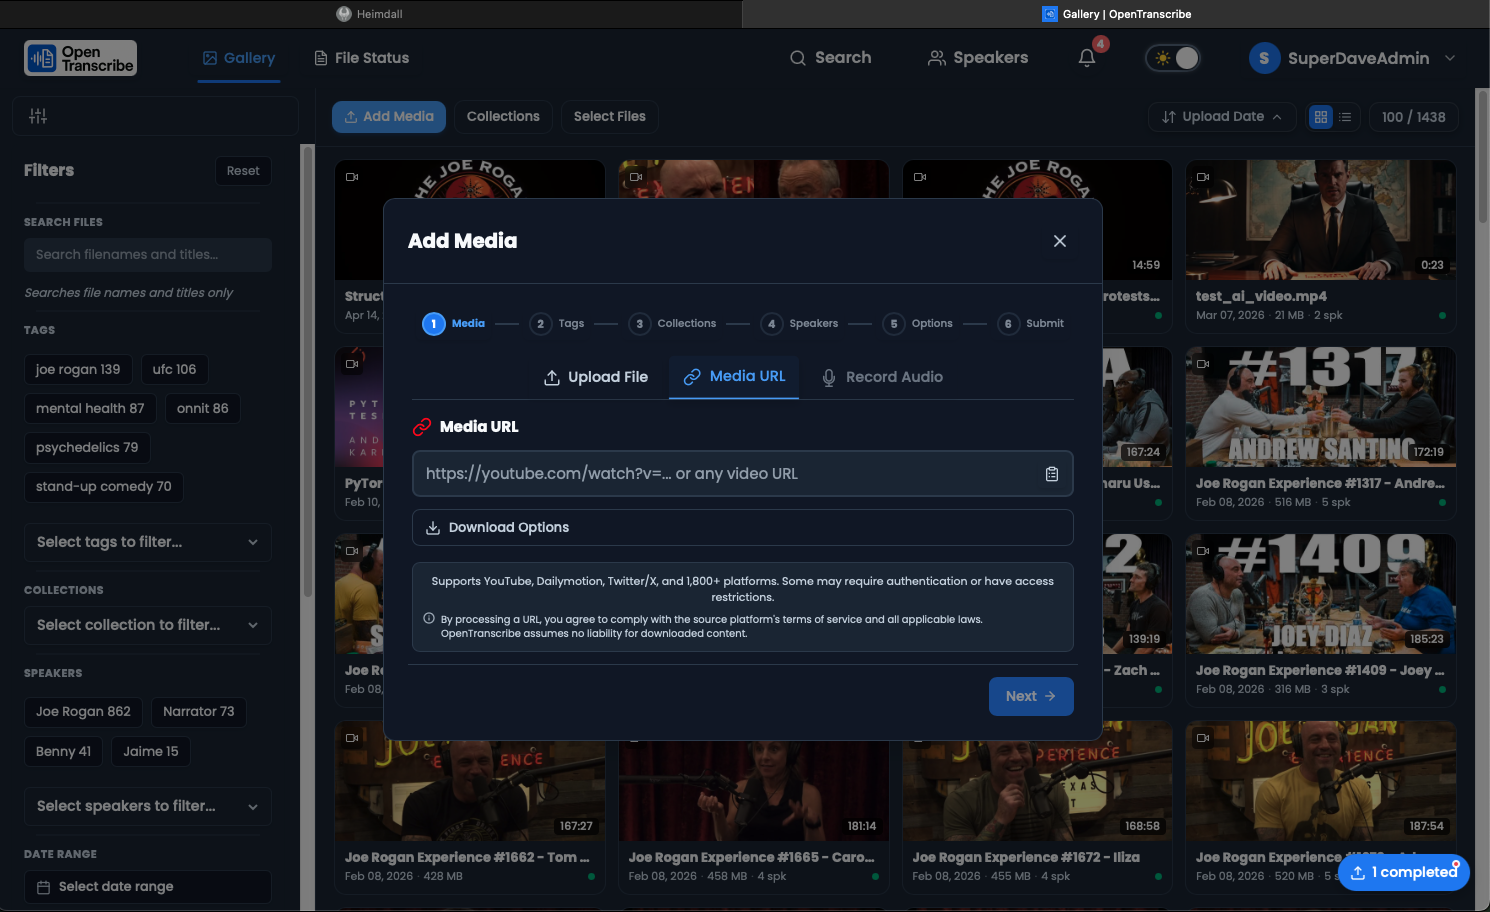
Via URL (YouTube)
OpenTranscribe can download and process YouTube videos:
- Click "Upload from URL" in the navbar
- Paste the YouTube URL (supports playlists too!)
- Click "Download and Process"
- The video will be downloaded and queued for transcription
Via Recording
Record audio directly in your browser:
- Click the microphone icon in the navbar
- Select your microphone device
- Click "Start Recording"
- Monitor audio levels to ensure good volume
- Pause/Resume as needed
- Click "Stop" when finished
- The recording is automatically uploaded and processed
Step 3: Monitor Processing
OpenTranscribe processes files through 13 stages:
Processing Stages
- Queued - File is waiting in the processing queue
- Starting - Worker is beginning processing
- Extracting Audio - Converting video to audio if needed
- Loading Models - Loading WhisperX and PyAnnote models
- Transcribing - AI transcription in progress
- Aligning - Word-level timestamp alignment
- Diarizing - Detecting and separating speakers
- Creating Profiles - Generating voice fingerprints
- Matching Speakers - Cross-video speaker matching
- Generating Waveform - Creating audio visualization
- Indexing - Adding to search index
- Saving - Storing results to database
- Complete - Ready to view!
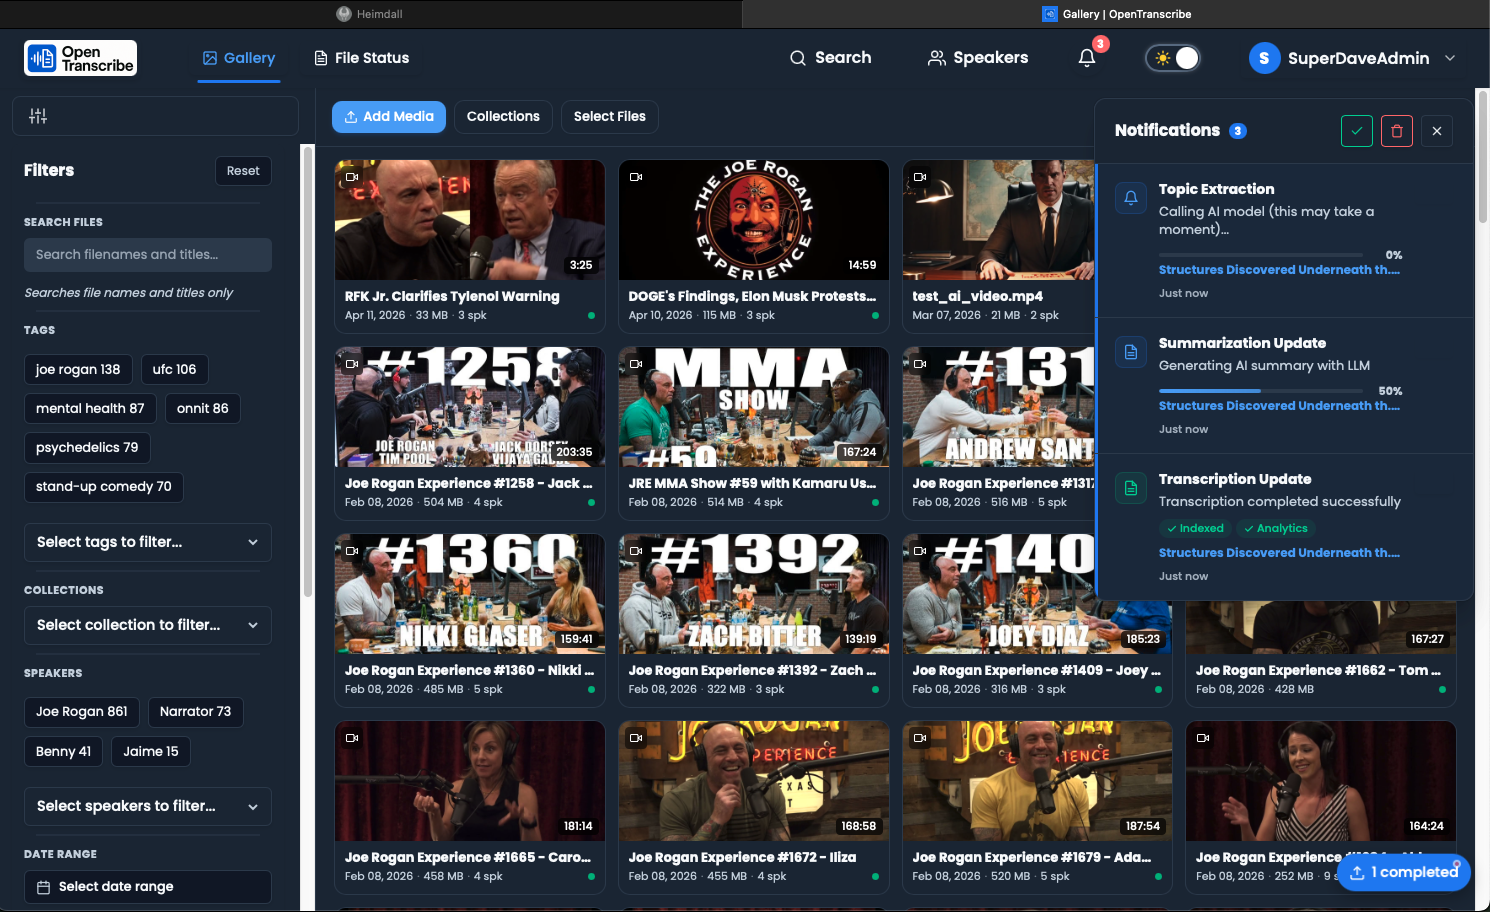
Where to Watch Progress
Real-Time Updates:
- Upload Manager (bottom-right floating panel)
- Notifications Panel (bell icon in navbar)
- File Library (processing badge on file cards)
- Flower Dashboard (http://localhost:5555/flower)
Processing Time Estimates:
| Duration | GPU (RTX 3080) | CPU (8-core) |
|---|---|---|
| 5 min | ~30 seconds | ~5 minutes |
| 30 min | ~3 minutes | ~30 minutes |
| 1 hour | ~5 minutes | ~60 minutes |
| 3 hours | ~15 minutes | ~3 hours |
With GPU acceleration and the large-v3-turbo model (default), OpenTranscribe processes at ~40x realtime speed (full pipeline). A 1-hour file transcribes in about 5 minutes!
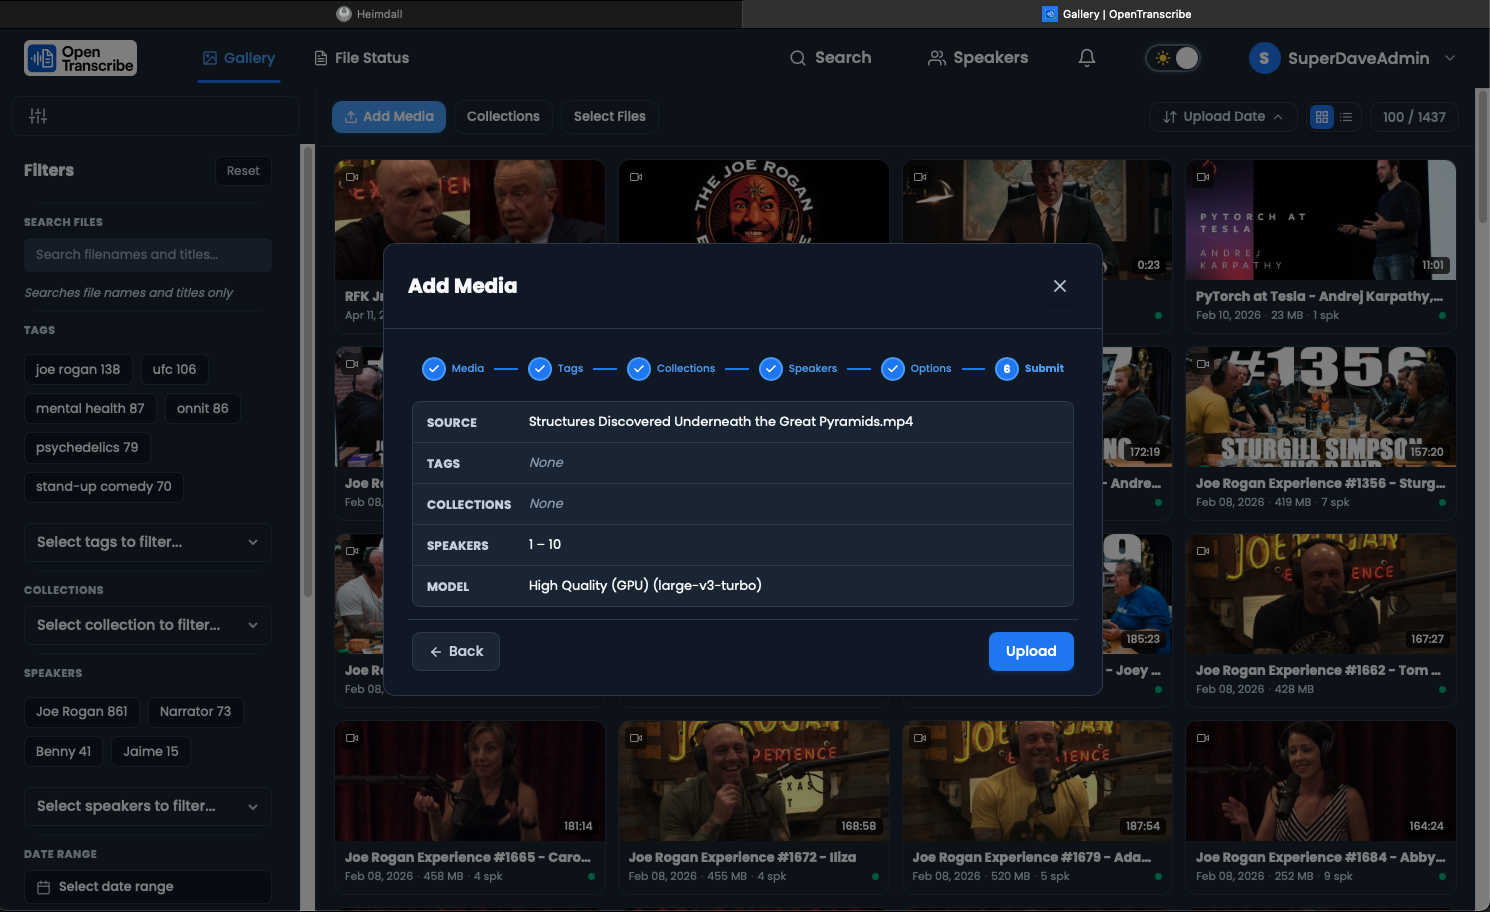
Step 4: View Your Transcript
Once processing completes, click on the file to view the transcript.
Transcript Features
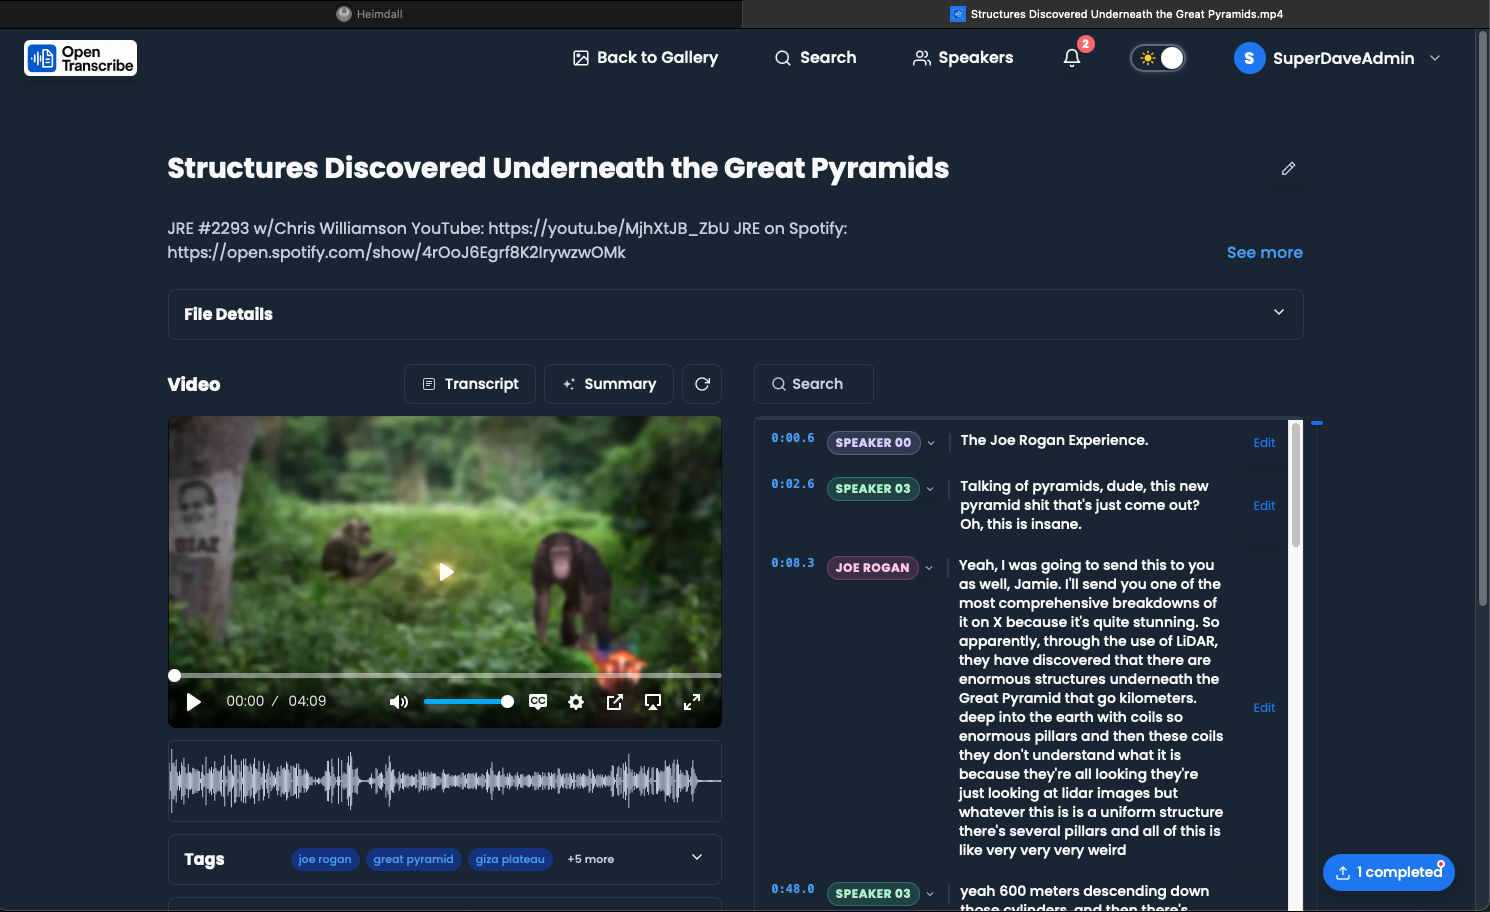
Interactive Transcript:
- Click any word to jump to that moment in the audio
- Speaker labels automatically assigned (SPEAKER_00, SPEAKER_01, etc.)
- Timestamps show when each speaker talks
- Word-level highlighting follows audio playback
Waveform Player:
- Click anywhere on the waveform to seek to that time
- Visual representation of audio amplitude
- Zoom controls for detailed view
- Speaker segments color-coded
Playback Controls:
- Play/Pause audio playback
- Speed control (0.5x to 2x speed)
- Volume control
- Keyboard shortcuts (Space to play/pause, arrow keys to seek)
Step 5: Edit Speaker Names
OpenTranscribe automatically detects speakers but labels them generically. You can edit names:
Edit Speaker Names
- Click the "Edit Speakers" button below the transcript
- Click on a speaker label (e.g., "SPEAKER_00")
- Type the actual name (e.g., "John Smith")
- Press Enter or click outside to save
- The name updates throughout the transcript instantly
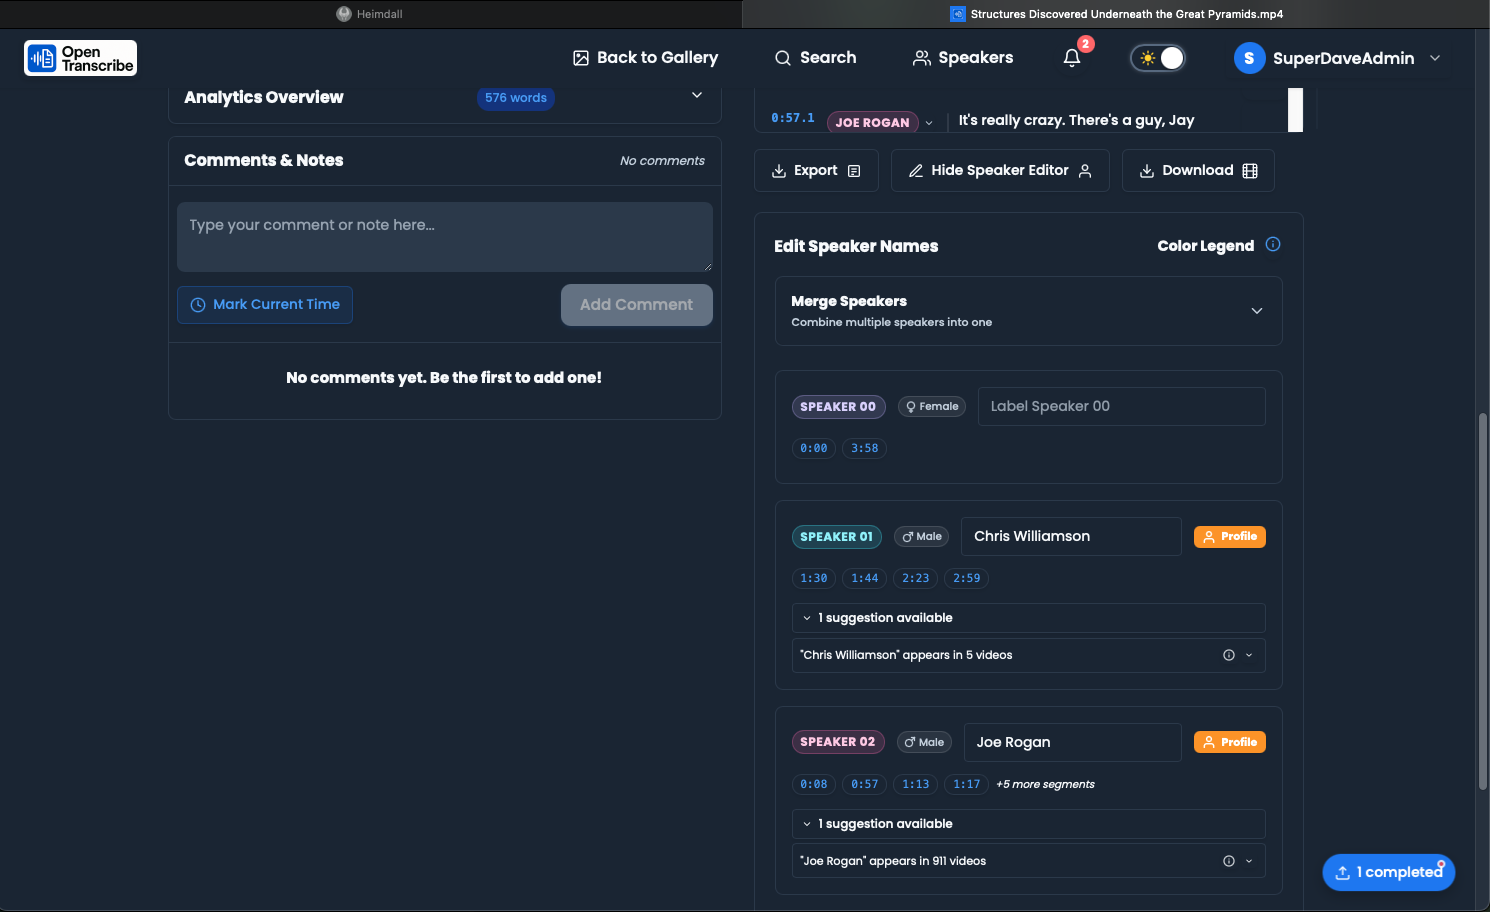
Create Speaker Profiles
When you name a speaker, OpenTranscribe can:
- Create a global profile for that speaker
- Generate a voice fingerprint using their audio
- Suggest that speaker in future transcriptions
- Track their appearances across multiple files
See Speaker Management for advanced features.
Step 6: Generate a Summary (Optional)
If you've configured an LLM provider, you can generate AI summaries:
Configure LLM (One-Time)
- Go to User Settings (gear icon)
- Click "LLM Configuration" tab
- Select a provider (OpenAI, Claude, vLLM, Ollama)
- Enter your API key or endpoint
- Test the connection
- Click "Save"
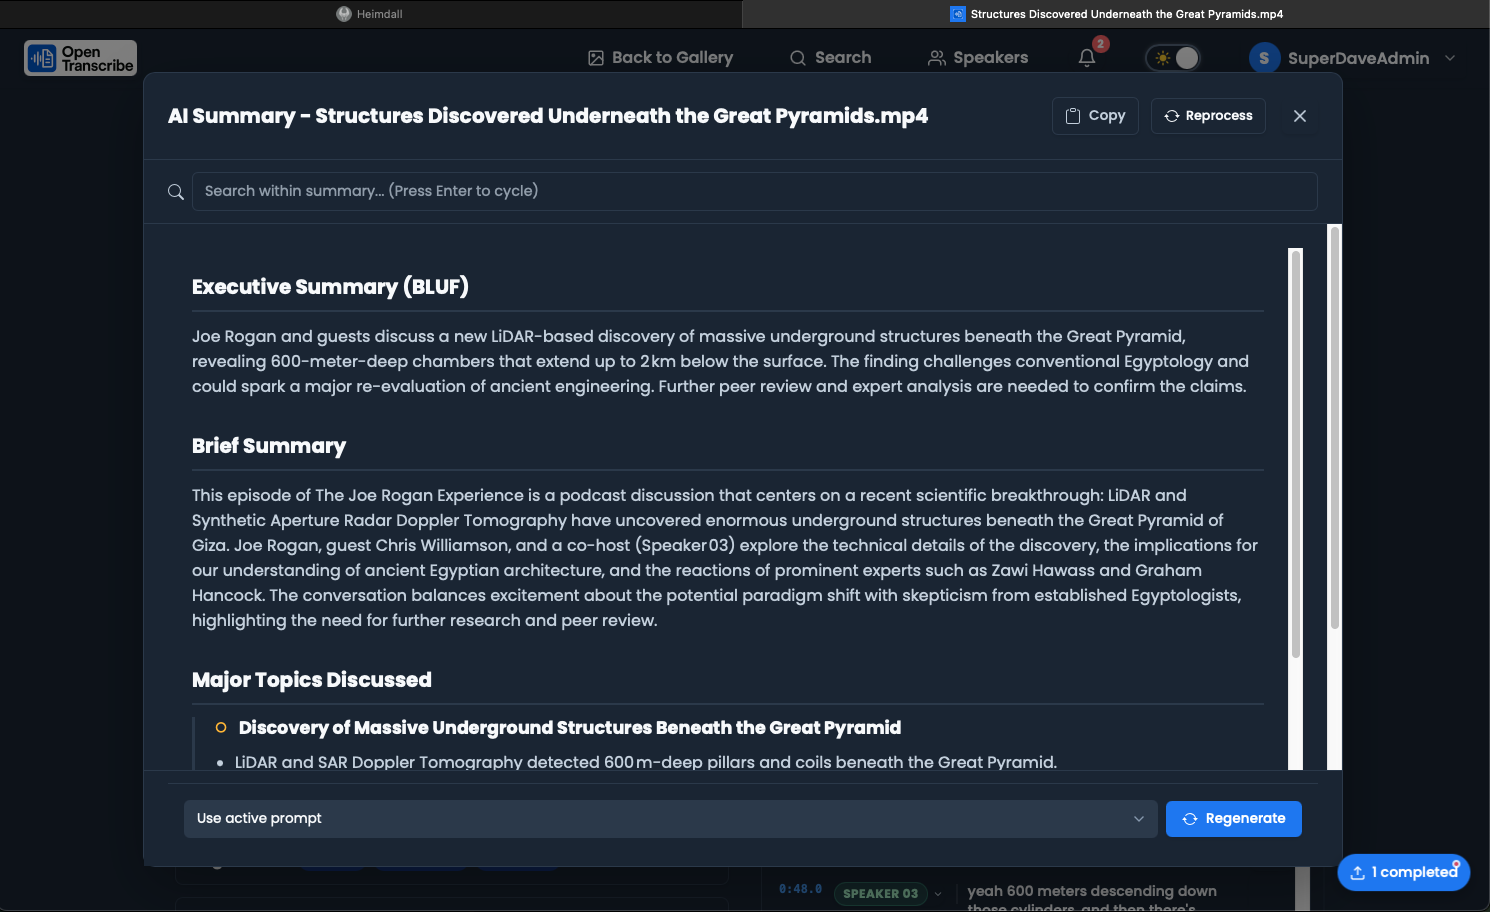
Generate Summary
- Open a transcription
- Click the "Summarize" button at the top
- Choose a summary prompt:
- BLUF (Bottom Line Up Front) - Executive summary format
- Meeting Notes - Action items and decisions
- Custom prompts - Create your own!
- Watch the progress (takes 10-60 seconds depending on length)
- View the summary in the Summary tab
Summary Features
The default BLUF summary includes:
- Overview - High-level summary in 2-3 sentences
- Key Points - Bullet points of main topics discussed
- Action Items - Tasks and assignments with priorities
- Decisions Made - Key decisions and outcomes
- Follow-up Items - Things to revisit or research
- Speaker Analysis - Who spoke most, key contributions
Step 7: Explore Advanced Features
Search Your Transcript
Keyword Search:
Search for: "project deadline"
Finds exact matches of that phrase
Semantic Search:
Search for: "budget concerns"
Finds related concepts like "financial constraints", "cost overruns", etc.
Add Comments
- Click anywhere in the transcript
- Type your comment in the comment field
- Press Enter to save
- Comments are timestamped and linked to that moment
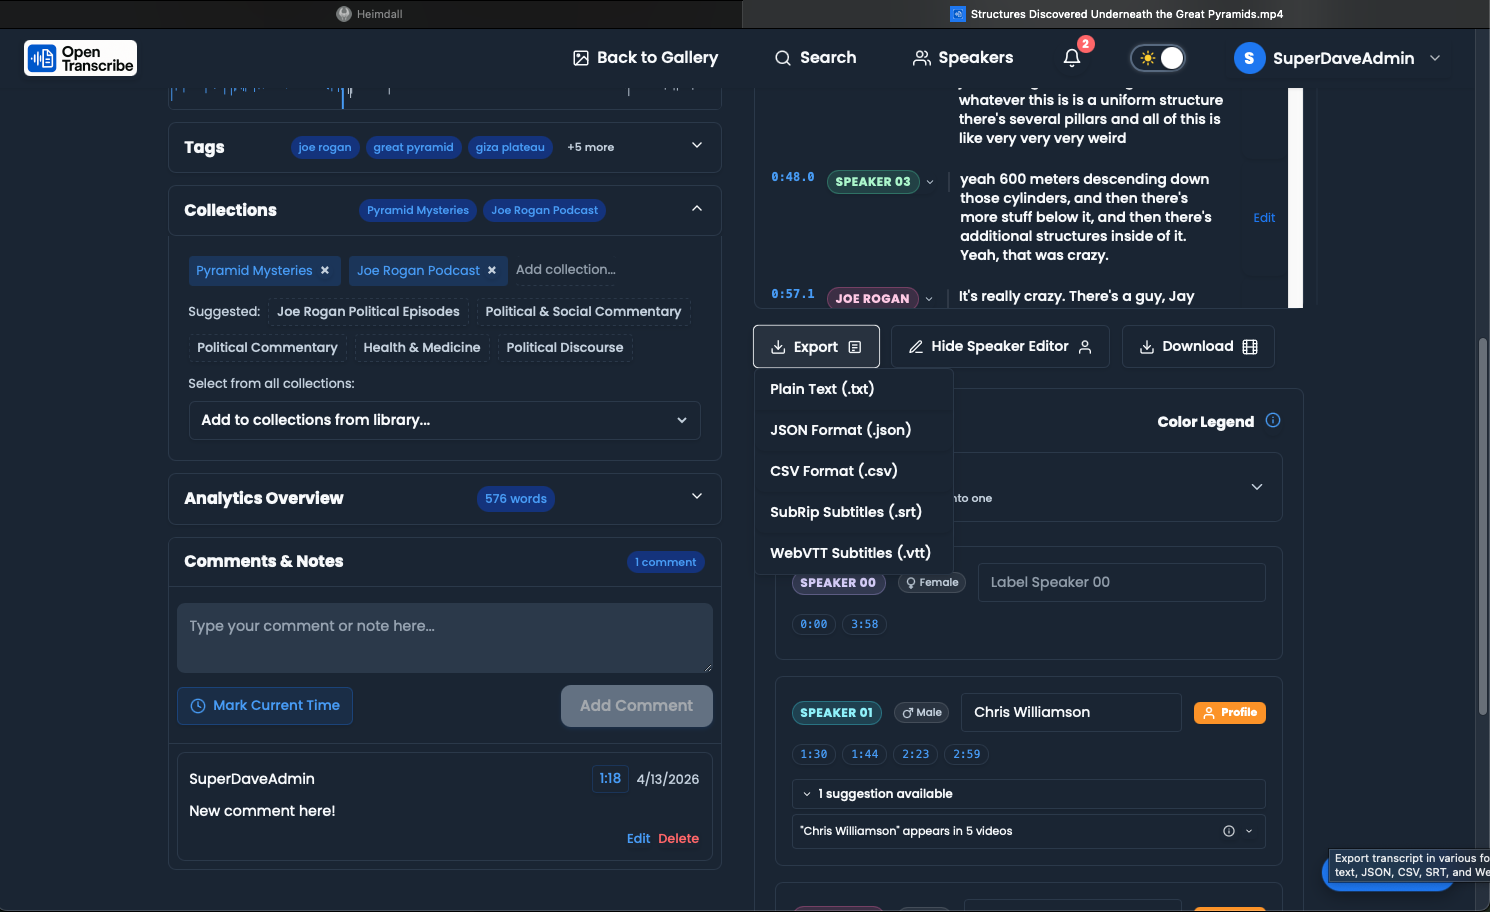
Export Options
Export Formats:
- TXT - Plain text transcript (configurable: timestamps, speaker names, comments)
- JSON - Structured data with timestamps and speaker info
- CSV - Comma-separated values for spreadsheet analysis
- SRT - SubRip subtitle file for video players
- VTT - WebVTT subtitle format for web playback
Export Methods:
- Click the "Export" dropdown on the transcript page
- Choose your format
- The file downloads immediately
See Uploading Files - Export Options for full details on each format.
Organize with Collections
Group related files:
- Click the "Collections" button
- Create a new collection (e.g., "Q1 2024 Meetings")
- Add files by clicking the collection tag
- Filter your library by collection
Performance Tips
For Faster Processing
- Enable GPU acceleration if available
- Use smaller models for quick drafts (base or medium)
- Process overnight for large batches
- Multi-GPU scaling for high-throughput needs
For Better Accuracy
- Use large-v3 model for best transcription quality (including non-English and translation tasks)
- Good audio quality - clear, well-recorded audio
- Edit speaker names to improve future speaker matching
- Verify and correct any transcription errors
Troubleshooting
Upload Fails
- Check file size (must be under 4GB)
- Check format (must be supported audio/video)
- Check disk space (need enough storage)
- Try again - network errors can be temporary
Processing Stuck
- Check logs:
./opentranscribe.sh logs celery-worker - Check Flower: http://localhost:5555/flower
- Restart workers:
./opentranscribe.sh restart - Check GPU memory:
nvidia-smi
Poor Transcription Quality
- Improve audio - re-record with better microphone
- Reduce background noise - use noise cancellation
- Larger model - switch to
large-v3for better accuracy - Language setting - ensure correct language selected
Speakers Not Detected
- Check HuggingFace token - required for diarization
- Clear audio - speakers need distinct voices
- Adjust MIN/MAX speakers in configuration
- Manual editing - edit speaker labels manually if needed
Next Steps
Now that you've created your first transcription, explore:
- Speaker Management - Advanced speaker features
- AI Summarization - Generate insights from transcripts
- Search & Filters - Find content across all files
- Collections - Organize your media library
Need Help?
- FAQ - Common questions and answers
- GitHub Issues - Report bugs or request features
- GitHub Discussions - Ask questions and share tips
Happy transcribing!